はい、大量注文の前に品質や詳細をご確認いただくためのサンプルをご提供できます。

 著者
著者
For retail and private-label teams, cosmetic bags for travel should be specified from the kit outward, not from an attractive silhouette inward. The useful question is not “How many pockets can fit?” It is “What must the customer reach, separate, and protect during a real trip?” Start with the routine, translate it into zones, verify the construction on a sample, and only then lock the bulk brief.
In the three sampled consumer-facing pages behind this topic, pockets, hooks, and wipeable linings are easy to describe; the harder buyer task is turning those features into dimensions, closure requirements, inspection points, and a quotation a supplier can price accurately.

Capacity should follow the customer and the trip length. A short business trip, a week-long holiday, and a shared family wash bag do not create the same loading pattern. Define the intended kit before choosing a nominal small, medium, or large size. Record the largest bottle, the longest brush, the number of products, and which items need to be reached first.
Small travel cosmetic bags work best when the target customer carries a short routine: a few complexion products, lip color, one or two brushes, and perhaps a travel-size skincare bottle. Give this tier one clear main space and a limited number of visible pockets. A divider that looks organized but consumes the working capacity can make the bag harder to use when it is full.
Specify packed dimensions as well as empty dimensions. Ask where the customer will open the bag, whether it must sit inside a tote or carry-on, and whether a flat opening matters more than extra depth. A simple access sketch is often more useful to a pattern maker than a generic reference photo.
Longer trips need more than a larger cavity. Bottles, brushes, palettes, and small accessories behave differently in transit, so assign them separate zones or a removable insert. A bottle pocket can stop liquid containers from rolling into tools; a mesh pocket can keep small items visible; a wide main compartment can hold a pouch that the customer removes at the hotel.
Set a loading limit that reflects the retail promise. If the bag is intended to hold a full routine, pack a representative kit before approving the dimensions. If it is intended for a light routine, do not add unused dividers simply because a competitor shows them. The assortment should make the capacity choice obvious at shelf and online.
Once the kit is clear, turn it into a supplier-ready brief. For every zone, note the item group, approximate quantity, largest object, preferred orientation, access frequency, and whether separation is for protection, visibility, or presentation. This gives the supplier a measurable layout instead of a request for “more organization.”
Use a compact matrix with columns such as zone, contents, quantity, largest item, access, closure, and cleaning check. For example, a brush zone may need length and soft retention; a bottle zone may need upright support; a flat pocket may be reserved for palettes or documents. The matrix also exposes conflicts early: a stiff divider may improve separation but reduce the space needed for a wide palette.
Decide which openings the customer can see at a glance. A top zipper, a fold-out panel, or a transparent pocket each changes how the bag is packed and how much reinforcement the sample needs. Keep the core zones stable across colorways so the collection remains recognizable, then vary print, trim, or logo placement without changing the working geometry. Print and logo choices sit on top of a fixed layout; Meier’s custom-printed cosmetic bag is a working example.

A travel makeup bag set is useful when the assortment has a clear separation story: daily makeup in one pouch, toiletries in another, or wet items kept apart from dry products. Nested pieces can also let a retailer offer a compact entry SKU and a larger bundle. The set adds packaging, labeling, and SKU complexity, however, so it should solve a real loading problem rather than add pieces for visual fullness.
If one bag already gives each zone a clear job, a single SKU may be easier to explain and replenish. If the kit changes by trip or customer, a modular set may create a stronger retail proposition. Put the choice in the brief, including how the pieces are packed and sold together.
Material selection should follow the loading pattern, cleaning expectation, and price position. Soft cosmetic bags and cases can use different outer materials, linings, and reinforcement levels; the name alone does not define performance. Write down the surface, lining coverage, seam treatment, zipper type, hardware finish, and the claim the finished model is expected to support.
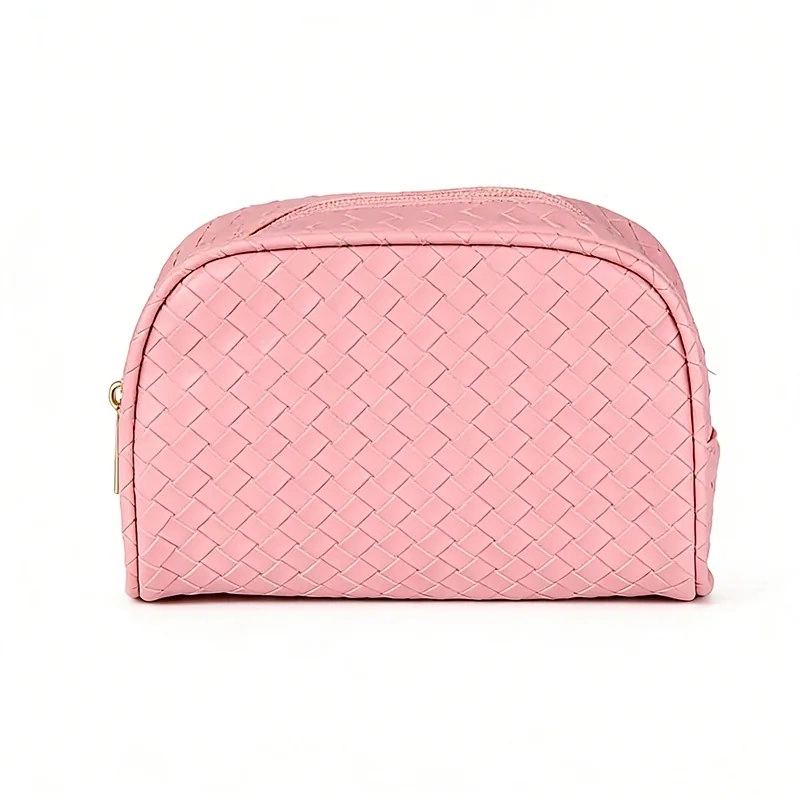
One Meier cosmetic-bag model uses a weave-plaited PU exterior, a metal zipper, and an easy-clean surface. Its working size is 12 × 8.5 × 19 cm, with size, color, and plaited-style options; the model’s minimum order is 500 pieces for each design and color. For this model, the stated protection position is helping prevent contents from getting damp or slipping out.
Those details are a useful starting specification, not a universal promise for every bag. Keep any moisture or “waterproof” language tied to the exact material, lining, zipper, and approved construction. A buyer should ask to see the claim on the sample and confirm the wording that will appear on packaging and product pages. For a concrete starting point, review Meier’s PU leather travel cosmetic bag and Meier’s stock small makeup bag, then request the current specification before using either as a base.
“Easy to clean” becomes useful only when a buyer can check it. Wipe the areas that will contact cosmetics, inspect whether the lining reaches the seam, run the zipper through the full opening, and look for residue traps around corners and binding. Then pack the bag and check whether the shape remains usable when the main compartment is full.
The same sample should expose stitch consistency, edge alignment, pocket placement, and hardware movement. If a design uses a light lining, a structured base, or a removable insert, record those choices separately so a later material substitution does not silently change the product claim. A short test list protects the customer experience better than a broad adjective.
Build the inspection sheet around four checkpoints: incoming raw material, in-process monitoring, finished-product testing, and pre-shipment random inspection. At arrival, check PU fabric, hardware, zippers, threads, and accessories for material type, color consistency, texture, and thickness. Reject non-conforming material before it reaches cutting. This keeps the lining and closures tied to the same quality record as the outer surface.
Sampling is the handoff between a concept and a product that can be quoted. Use the actual kit, not an idealized list, and have the buyer review both the physical result and the written specification. A sample that looks right empty may fail once bottles, brushes, and a palette occupy the same space.
Load representative bottles, brushes, palettes, and small accessories. Check whether the first-use item is reachable without removing everything else, whether the zipper opens smoothly under load, and whether dividers still hold their shape after repeated loading. Photograph the packed state for the approval record and note any item that does not fit the intended orientation.
For Meier’s cosmetic-bag model, the listed sample time is 5–7 days and the bulk lead time is 30–45 days after order details are confirmed. The current quotation should still confirm timing for the selected materials, construction, and revision count. If the sample needs a second round, decide whether the change is a dimension adjustment, a component change, or a new layout so the schedule remains understandable.
Use the sample as a controlled handoff. Move from material preparation to a first sample, a second sample when needed, and sample approval before bulk production. Sign off on material, craftsmanship, color, measurements, and functionality in the approval record. After deposit payment, the formal order is locked into the production schedule; a design or material change after confirmation can affect the quotation, lead time, and production schedule.
Approval should freeze the details that make the bag sellable: measurements, material and lining, color, logo method, zipper, pocket count, packaging, and the packed-kit result. After confirmation, bulk production should follow that sample. A later material or design change can affect the quotation, lead time, and production schedule, so capture it as a new revision instead of treating it as a casual request.
For a broader travel private-label workflow, Meier’s private-label travel customization guide offers a useful adjacent reference for keeping design, material, and order details together. Apply the same version discipline to the cosmetic-bag brief, even when the final product is smaller.
The final brief should let a supplier quote the same product the buyer approved. Put the customer use case, loading assumptions, construction, branding, packing, quantity, and timing in one request. This reduces the risk that a visual reference survives while a critical pocket, lining, or closure detail disappears in email threads.
Include the target customer and trip use, packed dimensions, compartment sketch or reference, outer material, lining, color, zipper and hardware, logo artwork, packaging, quantity by color, sample request, desired launch date, and the questions that need a current answer: MOQ, sample timing, bulk timing, payment, and shipping. If you are adapting a stock base, identify exactly which parts may change.
Do not assume that a model-level MOQ applies to every future design. The 500-piece figure above applies only to that model and should be reconfirmed in the quotation. To start from an existing design rather than a blank brief, review Meier’s cosmetic bag range and confirm which parts of a listed model can be adapted.
During cutting, sewing, and assembly, inspect accuracy, stitch tightness, edge alignment, seam strength, and correct installation of zippers and other functional parts. Before packaging, complete a 100% visual and functional inspection for stains, scratches, shape, stitching, seams, zippers, pockets, and design functions. Before shipment, use the agreed AQL plan to record appearance, structure, functionality, packaging, and labeling; classify any defect and specify rework or scrap before release. The factory evaluation checklist can help the buyer turn those checkpoints into acceptance criteria.
A reliable travel cosmetic-bag concept is not the one with the most pockets. Build the compartment matrix first: list each kit item, zone, largest object, access frequency, closure, and cleaning check. Then send that matrix with a packed sample for Meier’s review, and approve the model only when access, separation, construction, and acceptance checks agree. A quotation is most useful after that evidence is fixed, because the supplier can price the product the customer will actually receive.
Q1: How many compartments should a travel cosmetic bag have?
A1: There is no universal count. Start with the customer’s kit, give each zone one job, and add a divider only when it improves access or separation enough to justify the capacity it consumes.
Q2: Is PU leather practical for cosmetic bags for travel?
A2: It can be practical when the selected model’s PU, lining, zipper, seams, and cleanability are checked together. The Meier PU example is model-specific, so confirm the final construction and claim on the approved sample.
Q3: What should a buyer send when requesting a quotation?
A3: Send the target kit, compartment sketch or reference, material and color direction, logo and packaging requirements, quantity, sample request, and launch timing. Ask the supplier to confirm the current MOQ, sample and bulk timing, and inspection scope.
下記のフォームにご記入ください。追って担当者よりご連絡させていただきます。